
Making custom ships
Here we will go over the workflow for adding new ships/ models with the Ego Blender tools.
The tools can be found on the Egosoft website follow the installation instruction to the letter! The Guide is also written under the assumption you know how blender works a little bit.
Personally i make the models in 3ds max and then get them into blender, so it will be a bit different for blender only users but not much. So you export your model as .fbx out of 3ds max and then import it into blender, make sure to set 3dsmax system/scene measure in metric and in meters, 1m in blender is 1m in X4. In 3ds max i split the mesh so up that each part is it´s own texture set, so we then can give each mesh it´s own material later in Blender.
example 1:
example 2:

Example 2 shows it a bit better then 1, on what i mean with splitting up the mesh to each texture/ material. Y+ is the front facing axes in Blender and on export the converter will rotate it so that in the xml later Y and Z are switched.
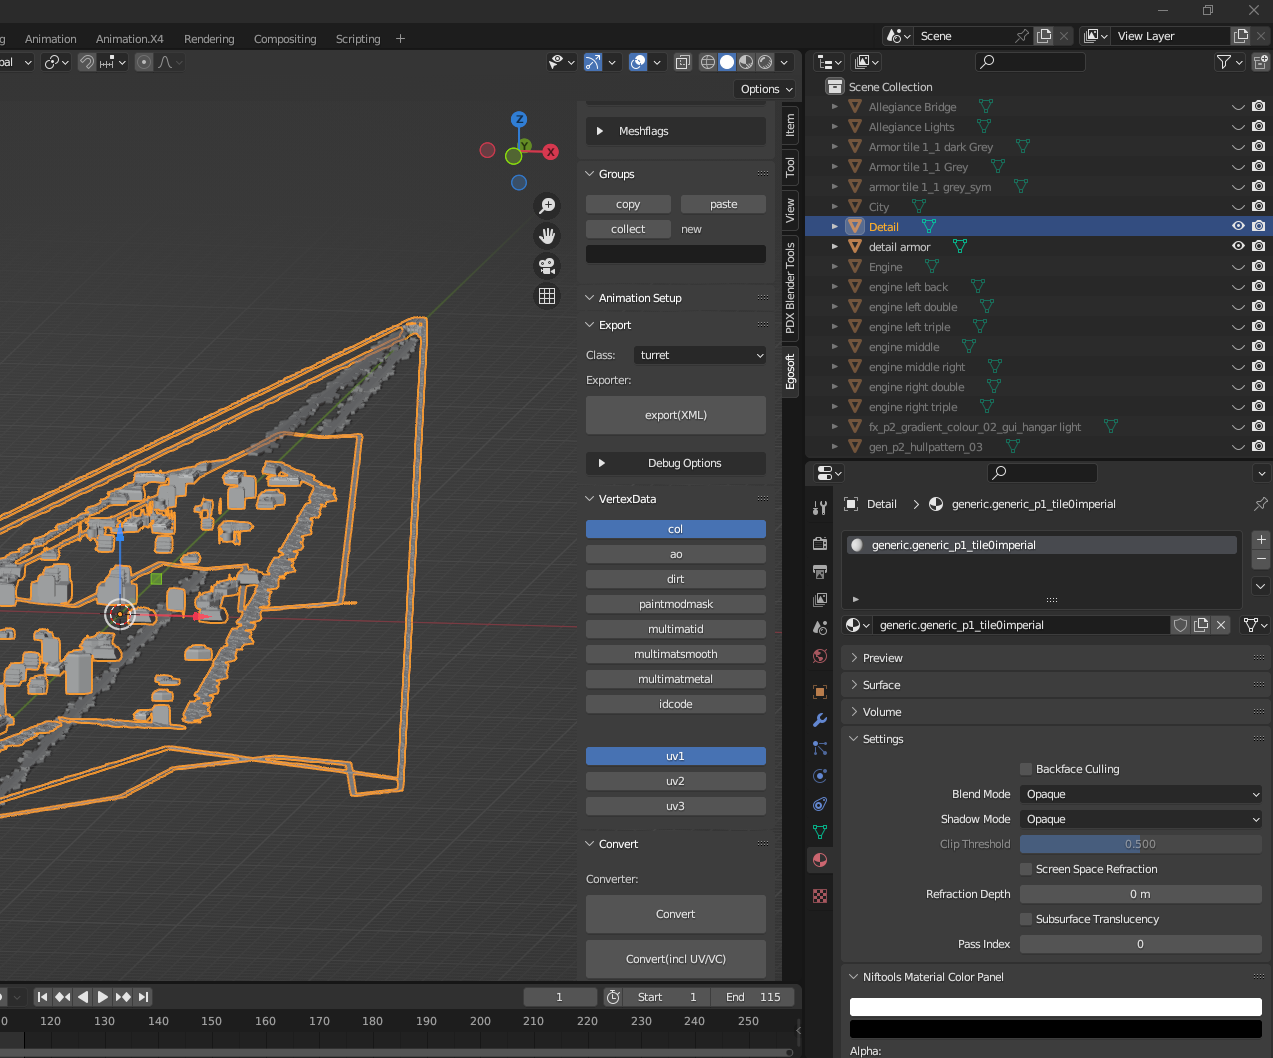
Next we change the naming for UV and Vertex color channels, to uv1 and col. You can also add them via the egosoft tool under VertexData but it will be all empty, meaning if you did UV maps or Vertexcolor already in 3dsmax or other softwares, you will need to redo them in blender again.
After changing the names, the blender tool will turn blue in the VertexData area, indicating that that part has them.
What each VertexData channel does:
- col = what color the part will have ingame for instance is it red, blue, grey or black
- ao = ambient occlusion, currently not used but egosoft has plans with it
- dirt = inverted baked ambient occlusion, is used in the newer ships materials and overlays rust or dirt textures ingame
- paintmodmask = where a paintmod ingame should be appearing or not (#FF0000: apply mask, #000000: do not apply mask; some other colors may be used on older models that did not use dirt (#FFFFFF: mask+dirt and #0000FF no mask+dirt))
- multimatid = used for multimaterials, what texture from the material the game should use here
- multimatsmooth = used for multimaterials
- multimatmetal = used for multimaterials
- idcode = for the ships ingame generated registration number
- uv1 = first uv channel, used for primary texture
- uv2 = second uv channel, originally used for controlling ship construction texture. No longer used.
- uv3 = third uv channel, used for dirt/streaks overlayed textures (separate from dirt layer)
On how to use multimats, Lc4Hunter wrote 2 guides about them: Working with Multimats and Multimats Reverse Engineering.
Next we edit the Material for that part, delete the currently assigned material and add a new one. The first name is the collection inside the material library followed by . and then the material name.
I recommend adding you own collection as diff to the material_library so they dont conflict with anything else, if that should ever happen.
<diff xmlns:xsi="http://www.w3.org/2001/XMLSchema-instance" >
<!-- Hull -->
<add sel="/materiallibrary">
<collection name="bsg">
<material name="bsg_hull_tile0" shader="P1_complex_surface.fx" blendmode="NONE" preview="none">
<properties>
<property type="BitMap" name="smooth_map" value="extensions\battlestar_galactica\assets\textures\bsg\bsg_hull_tile0_roughness" />
<property type="BitMap" name="metal_map" value="extensions\battlestar_galactica\assets\textures\bsg\bsg_hull_tile0_metal" />
<property type="BitMap" name="diffuse_map" value="extensions\battlestar_galactica\assets\textures\bsg\bsg_hull_tile0_diffuse" />
<property type="BitMap" name="normal_map" value="extensions\battlestar_galactica\assets\textures\bsg\bsg_hull_tile0_normal" />
<property type="Float" name="diffuseStr" value="1.0" />
<property type="Float" name="normalStr" value="0.9" />
<property type="Float" name="environmentStr" value="1.0" />
<property type="Float" name="Smoothness" value="1.0" />
<property type="Float" name="Metallness" value="1.0" />
<property type="Float" name="AnisoX" value="0.5" />
<property type="Float" name="AnisoY" value="0.5" />
</properties>
</material>
</collection>
</add>
</diff>
We do that now for all meshes and then join them together depending on what you want the part to be, for example part_main, part_detail. Best is to take a look at the example file for how the setup works.
From:
To:
For bigger parts we also create the .LOD1/ LOD2 and LOD3. For part_main we always need to create a .wreck, that can be a copy of part_main or it´s own model, it depends on what you want the wreck later to look like. We can also create a custom .col (collision) models, that is used for hits from weapons or if you can walk there, the Converter uses LOD1 for making the collision model, if there is no LOD1 it will use the part_xxx.
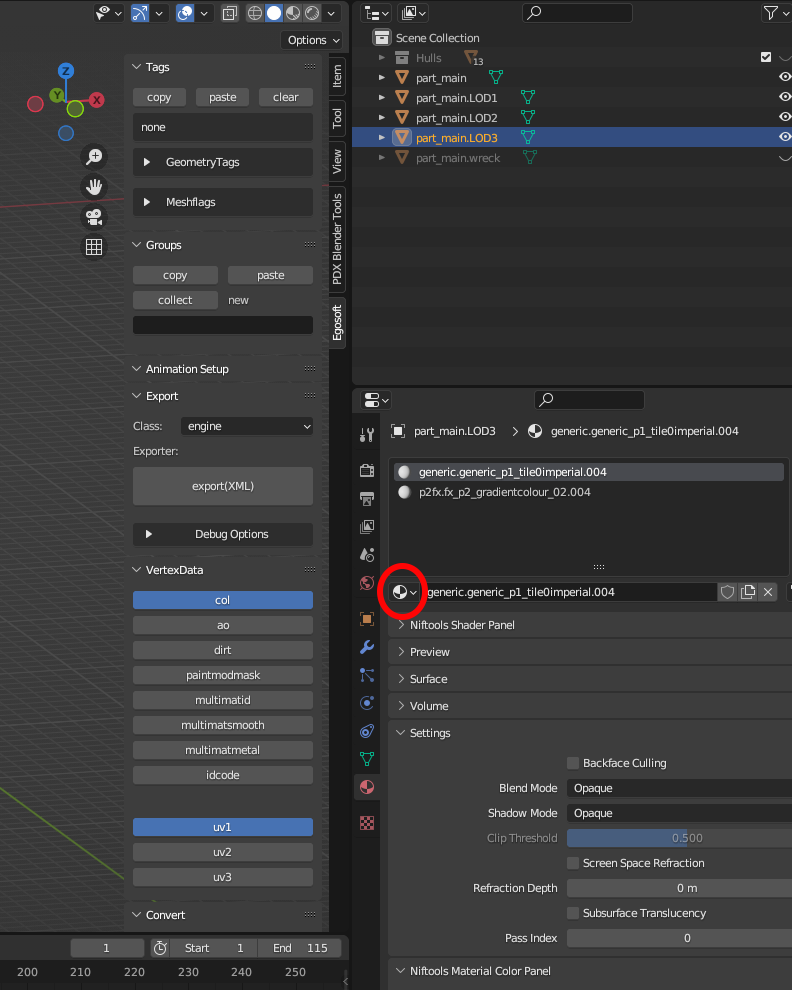
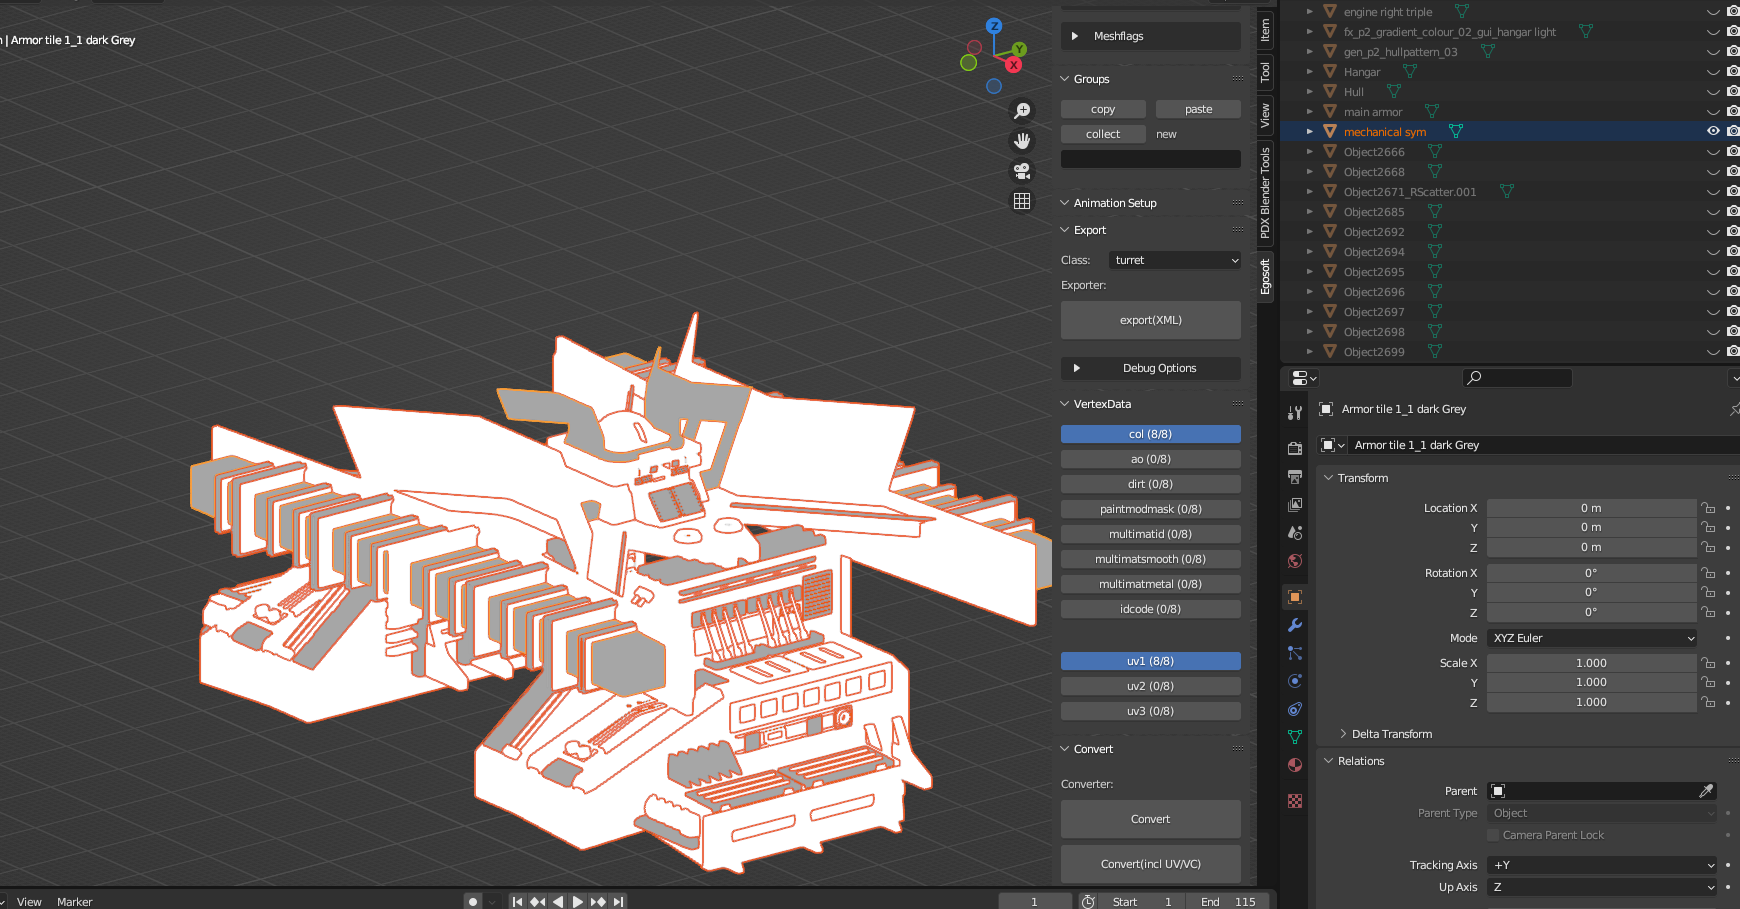
As you can see Blender has the habit of renaming everything with .001 when copyed. Click the ball in the red circle and change the material names to the ones without .00X, dont just rename them, blender will change the material on everything else.
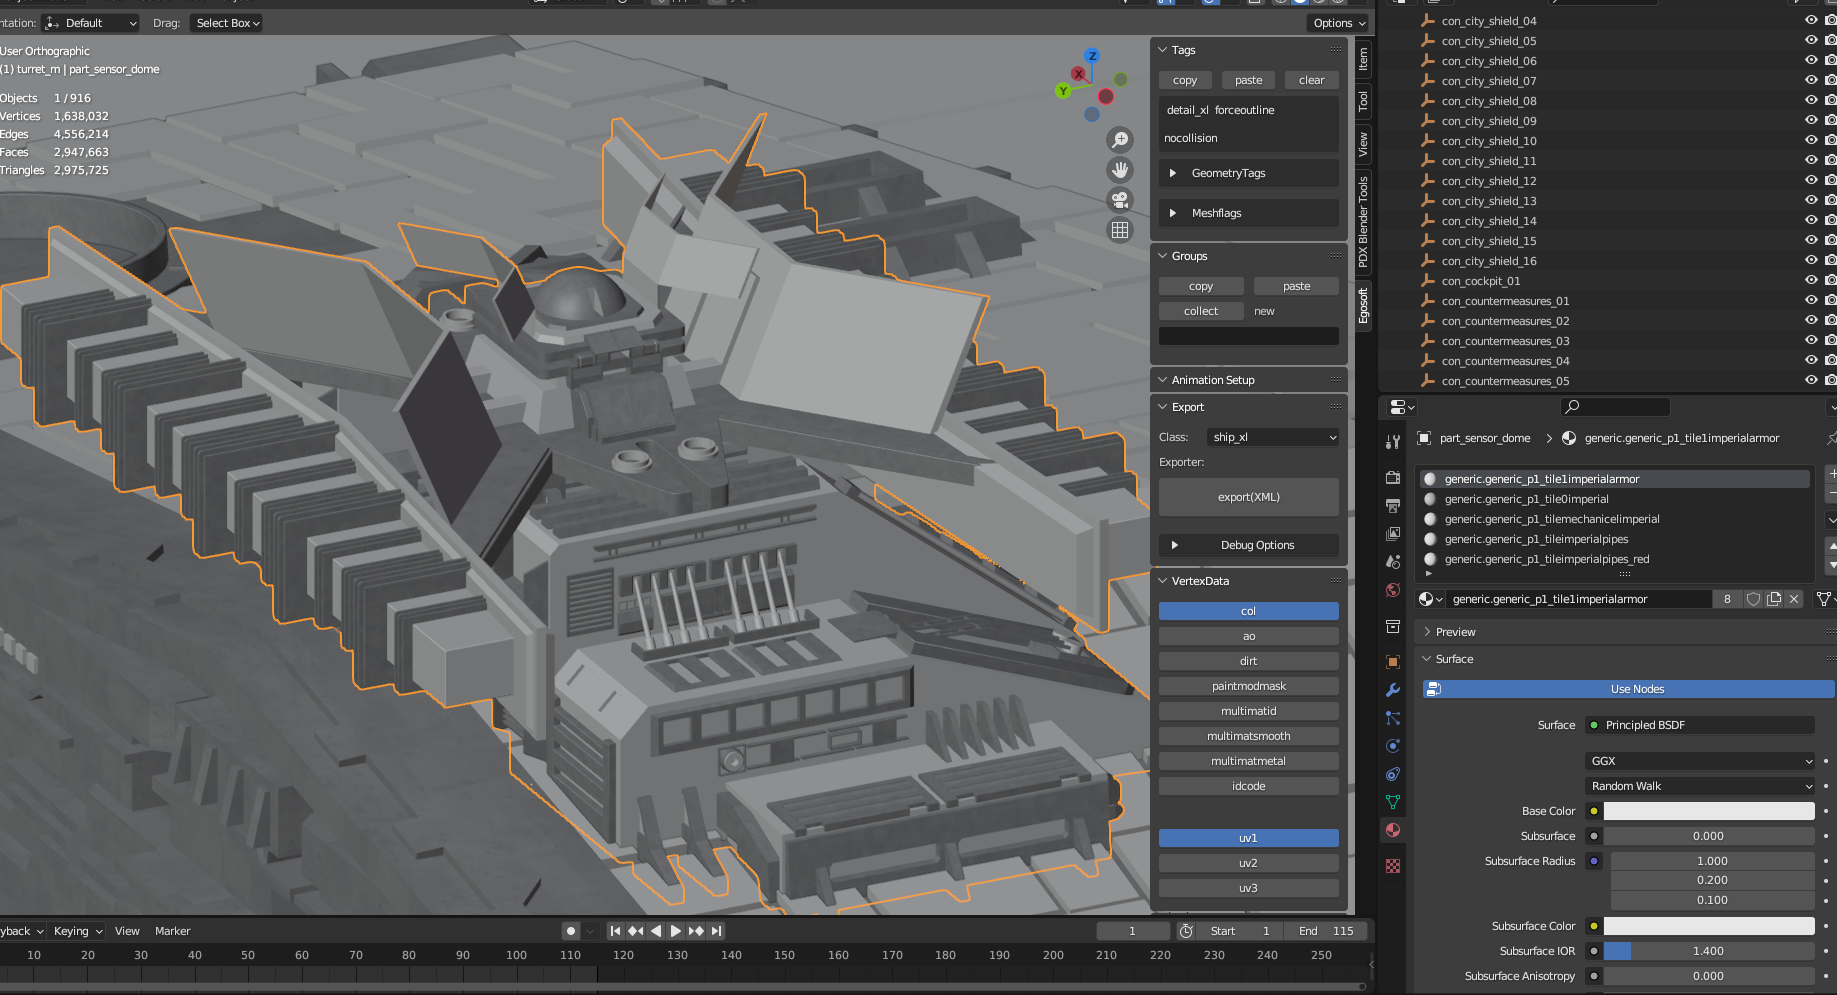
Back to the sensor_dome from earlier, in the pricture you can see on the egosoft tools the Tags area, for certain parts in this example it dosent have the .LODX meshes, we need to add certain tags for X4.
- detail_xl = tells the game the LOD range for this mesh without having specific .LODX
- nocollision = tells the game this part dosent has a collision for weapon hits
- forceoutline = with nocollision the renderer omits drawing this part and with the tag we force it back in so to speak
What each tag does can be found here: Tags
Next we make the jolt hulls for the physics part of X4 introduced with 6.0, click on your part_main go to object -> V-HACD and click Convex Hull.

Then next a window will appear where you can set up how it should make the jolt hulls.
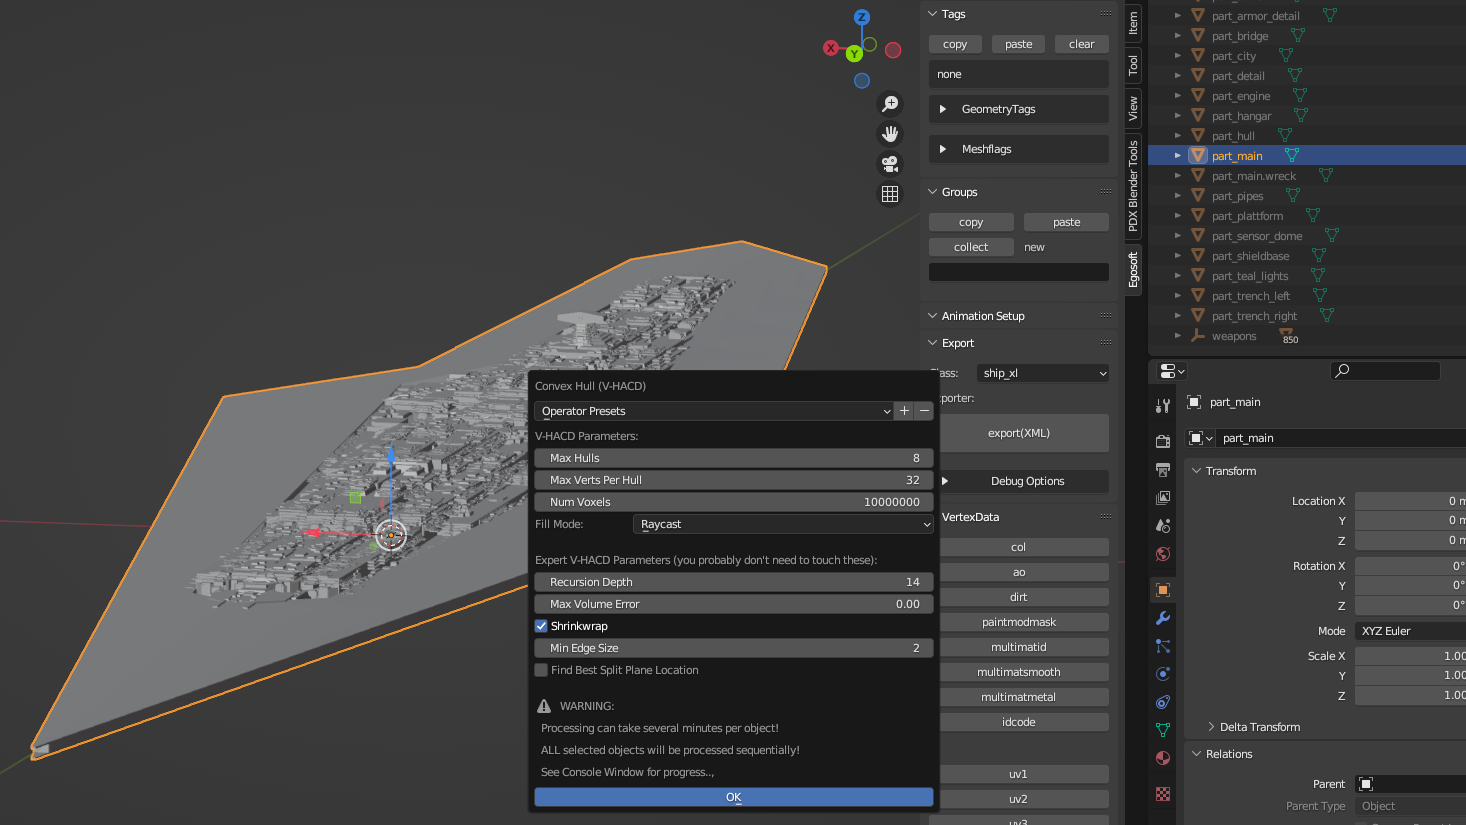
The top 3 parameters is what you usually change.
- Max Hulls = how many seperate hulls the model will have, max is 256. You need to play with the value and test if the amount is ok and no you dont always need 256 hulls, it depends on your geometry
- Max Verts Per Hull = how many vertics each hull part can have, you actually dont need to play with this
- Num Voxels = a generating thing, higher number means more details are taken into account. 2 more 0 is the max you can add, after that it chrashes
Hit ok and it will generate the jolt hulls for you, put into a seperate collection. It can take a while.
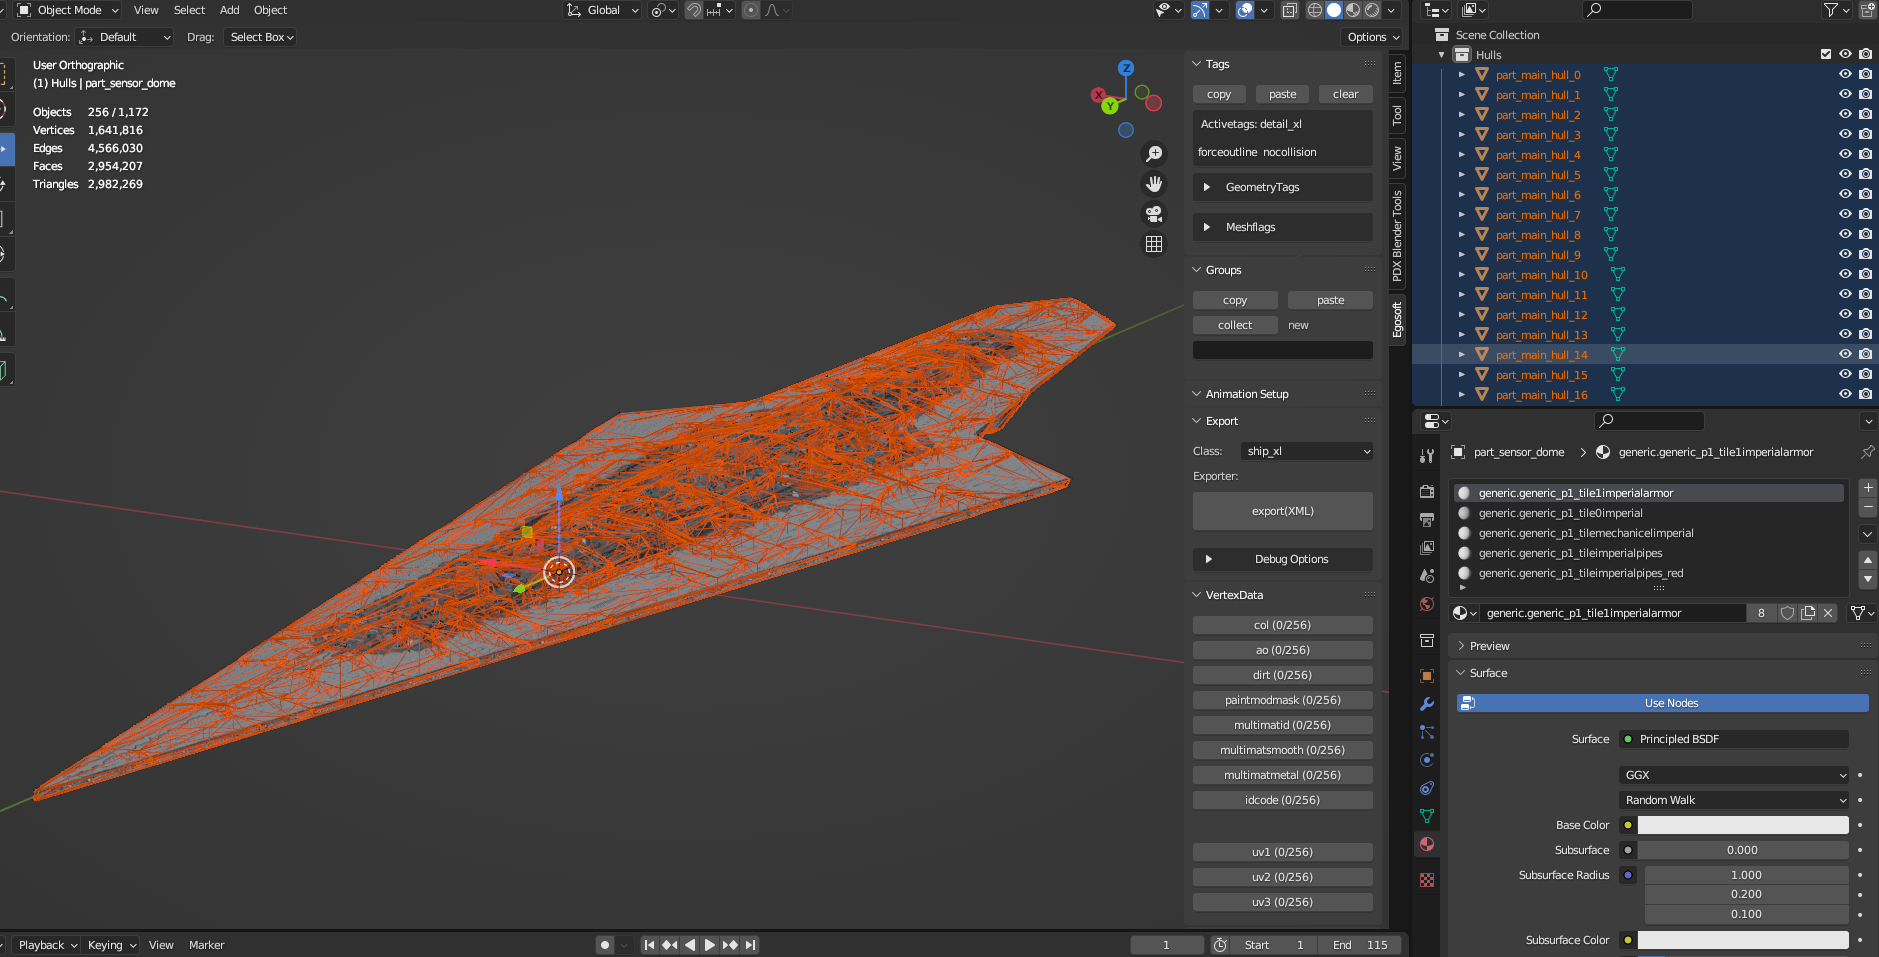
Also you can just use a custom collision mesh for generating jolt hulls but you need to rename it first to for example part_main. The generator is using the name for doing the hulls and name them accordingly. You can edit the hulls itself to in edit mode or delete some if the overlap is to big with others, in edit mode you move the vertics but be sure it still is convex.
Lights can be added into the scene to and edited how you like, they will appear in the xml top under layers, if not parented to a mesh.
The Last part are empty connections and groups, take a look at the example files and redo them the same way for your model, for doing them go to Add -> Empty choose one it will appear at your 3d cursor position. You can name them how you want, important are the tags it gets, for adding them click the white arrow and the row should expand. You click on the grey boxes and the tag is added, you can also copy them and paste into other emptys. Connections also can be put into collections for a better overview, you also can add new tags to the tool under Users\XXX\Documents\Blender and open the Blender_Properties.xml file.
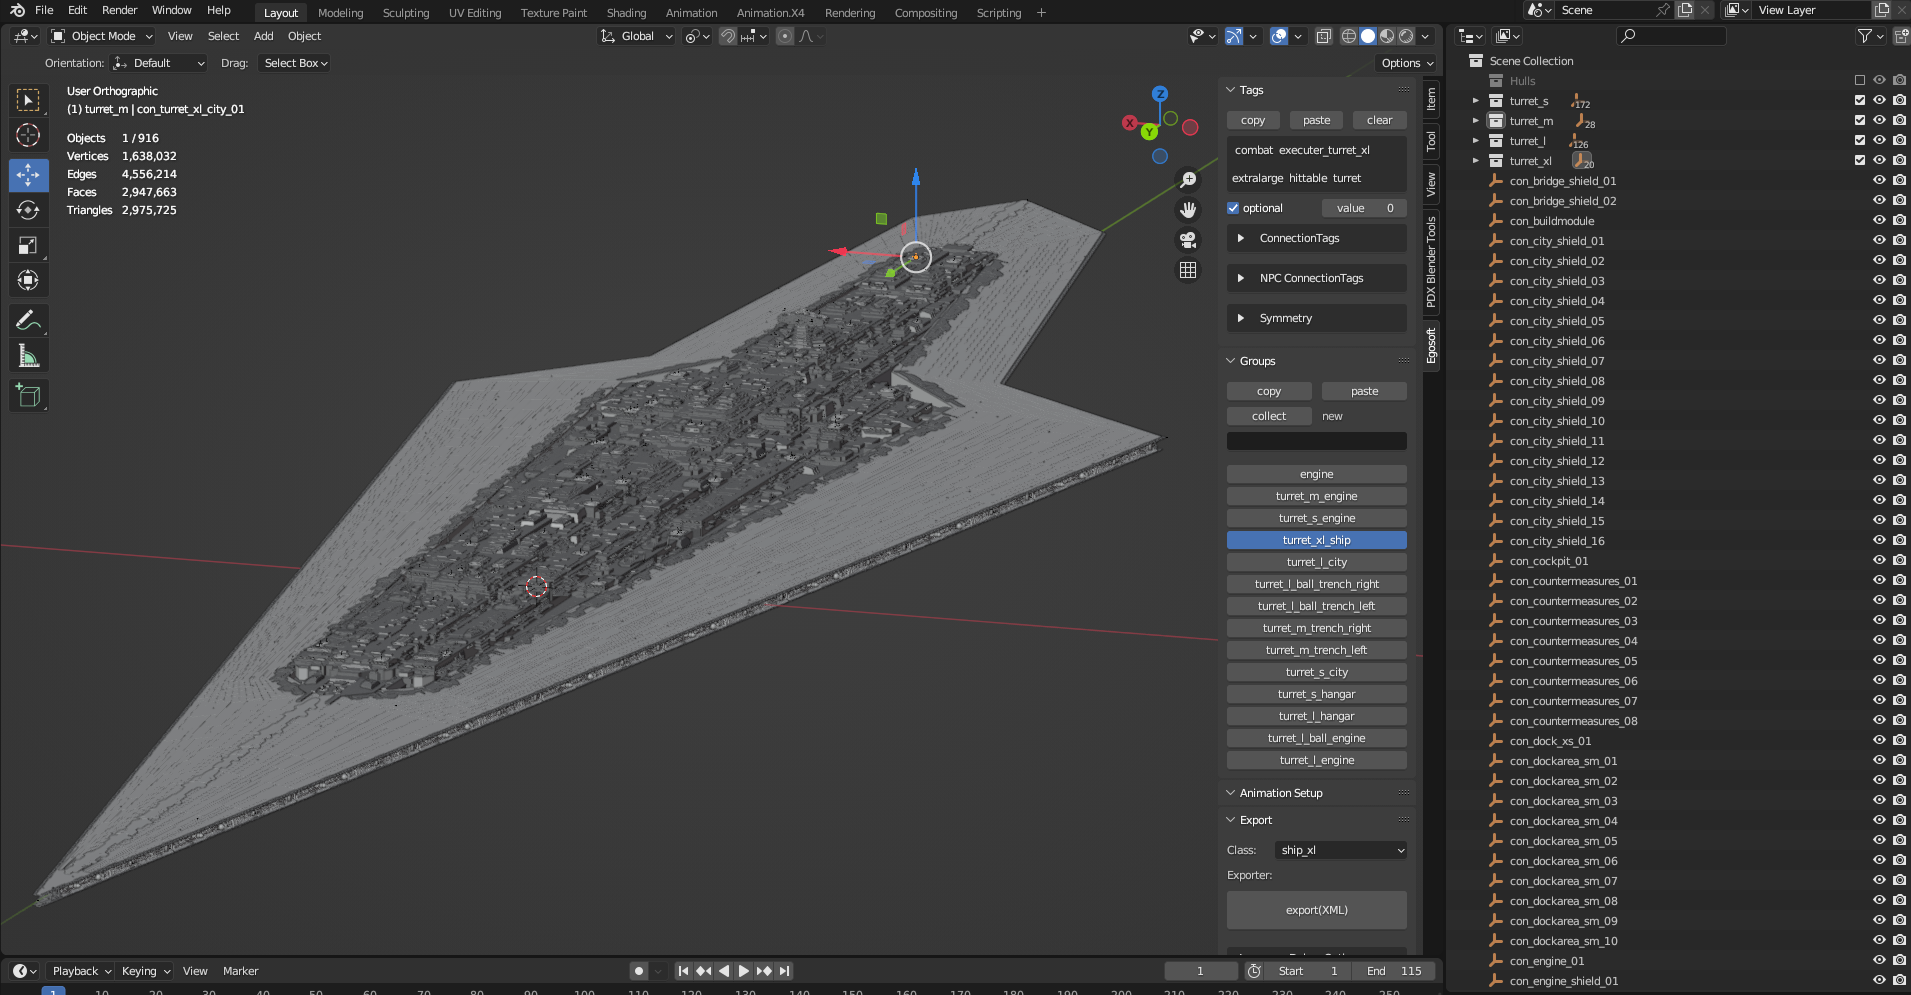
Groups have it´s own area in the tools where you can collect the ones in the scene or make new ones, for making new ones you write it into the black box hit enter and click new.
Then you select your empty/ mesh and click on the name of the list, it should turn blue indicating it is added to the empty/ mesh. Groups are needed for various things especially for turrets and shields, to tell the game they are together and for the shipview ingame. They are also used for animations, for instance you have two doors with the tag trigger_nearby, if you walk near it both doors will react at the same time with the same group.
With that we can start exporting the ship/ model, put your .blend file into the p1[assets] folder and open the file. Go to the ego tools in the export area and click on the class: button, here you can change the models class from ship to module to system, whatever you want it to be. Then hit export (XML), in the p1[assets] folder should appear a .dae and .xml file.
Now search for your P1 Converter Local.exe that was installed during the tool installation and use it, a command window should appear and starting to do stuff, when done the files will appear in p1data folder. With that you have a X4 ready asset to be put into your mod, now it´s the same workflow written by Brummbear. [WIP][Tutorial] Building your own ship for dummies 2
I will do follow up guides for IDCODE, Animation and Waypoints.